Friday, December 31, 2010

Make these cute elves


Cute, expressive Christmas elves...step by step!  A little late for Christmas this year, but you could always start making them now for next year! See tutorial at Cold Porcelain Tutorials.

Tutorial was written for cold porcelain and you can use either homemade cold porcelain or purchased brands such as Craft Porcelain.   See the recipes section of Cold Porcelain Tutorials (and Recipes) for a few different ways to make your own cold porcelain.   If that's not your thing, many other air-dry clays would work as well...especially the soft  pre-colored brands such as  Deco Clay, Cloud Clay, Hearty Clay, Makin's Clay and many other brands of soft, or semi-soft, clays.   

Wednesday, December 29, 2010

How to Wire a Spray of Clay Flowers


In the video below, Donna Lane shows us how to assemble our air-dry clay flowers into a spray or other arrangement.  This video demo features gumpaste flowers, but the process is exactly the same for air-dry clay flowers.

 If you haven't made any clay flowers yet, see menu bar above for 'Clay Flowers'.  There you'll find a list of different types of flowers you can make following some previously posted tutorials.   There are a number of different air-dry clays that work well for creating realistic flowers.    You'll want to have a light clay that will let you create very thin petals that will dry strong and a little flexible.   Homemade cold porcelain works well along with commercial brands such as Craft Porcelain, Lumina, Delight, DecoClay, Cloud Clay, Hearty Clay, and many other brands of soft, or semi-soft, clays.

Tuesday, December 28, 2010

How to Make a Cute Polar Bear


This video demo from Linda Peterson features a whimsical winter Polar Bear made with air-dry Cloud Clay. Cloud Clay is very soft and easy to use but dries to a hard, durable and matte finish in 24 hours or less.

Tuesday, December 21, 2010

Make a Big Bead Bracelet with Cloud Clay


This Cloud Clay tutorial from Linda Peterson is intended as a children's project, but the video demonstrates many air-dry clay techniques that could be applied to other projects!  Making this funky, big bead bracelet is a good learning experience!

Monday, December 20, 2010

Make a Cute Kitten in a Flower Pot


This tutorial to create a cute kitten sitting in a flower pot is from French artist Brigida Clement.    She has allowed translation to English, with proper credits to her original, of course.   Please visit her website at Babou Bricole.

Cute animal figures like this kitten can be made with just about any type of air-dry clay but they are particularly suitable to cold porcelain and the soft clays such as Makin's Clay, Cloud Clay or Model Magic.   When working with soft clays, it is important to let some parts dry for a few hours before assembling...such as between steps 7 and 8 of this project.   Otherwise the soft body may collapse under the weight of the head.

The clay pot is approximately 1.5 inches tall.  Add some clay flowers or something else of your choice to personalize the finished project.


Thursday, December 16, 2010

How to Make Filler Flowers and Small Daisies


Quite often, the methods used for making air-dry clay flowers are exactly the same as making sugar paste flowers ....with one exception!  You can use glue and other non-edible materials with air-dry clay flowers.     In this video, Elaine MacGregor demonstrates 2 different kinds of simple flowers to make....a 5 petal flower and a daisy-type flower.

Where she mentions using gum arabic to glue sugar paste together, just use white glue instead.  (Elmer's or Aleene's will do nicely!)   Note how she uses a glass to protect her paste from drying out!  Good idea for clay too!

Saturday, December 11, 2010

How to Make a Paperclay Snowman


This is a 5-part video demo from MLB Studios showing us how to make this folk art snowman with stick legs that can either stand or hang from tree.   Creative Paperclay is used but many other air-dry clays would work as well.    Using an instant papier mache (such as Celluclay) could give it an even more vintage look and feel!

Part 1... Making the Armature


Part 2... Adding the features


Part 3... Adding details


Part 4... Adding color


Part 5... Finish

Monday, December 6, 2010

Paperclay Christmas Ornaments

Martha Stewart shows us how to make ornaments with Creative Paperclay and cookie molds.   Delight Clay is from same company but is ultra-lightweight, so might be an even better choice for ornaments!

Saturday, December 4, 2010

Customize a Face Mold for Santa


Air-dry clay can be used with push molds just like polymer clay.  Today's tutorial from Polymer Clay Express shows you how to customize a Polyform (Sculpey) face mold to create a Santa face.   The completed face can be used for an ornament, package topper or a Santa doll.    Tutorial:  Customizing "Grandpa" to make a Santa ornament    Even though the tutorial was written for polymer clay, the steps are essentially the same with air-dry clay...just don't bake and let it air dry instead.    You can leave the clay in the mold while drying, if desired.    

The tutorial doesn't make it clear that flesh colored clay must have been used to start with (it looks white in photos) because it skips the step to paint the flesh color and goes right into antiquing.    For air-dry clay users, you can tint the raw clay in advance or paint with acrylics after it cures.    I prefer multiple THIN layers of paint for the skin tones.    

Only the very soft air-dry clays are available pre-colored and other brands must be pre-tinted or painted.   Some soft clays may work OK in the push molds but many soft brands do not hold detail well.   It will look OK at first, but as it dries it sorta 'puffs-up' and detail gets lost.      Clay brands such as Creative Paperclay,  Delight and LaDoll may work better.   Those clays also allow more customizing because re-shaping and blending of seams is easier.   Please leave comment if you have any questions!


Friday, December 3, 2010

Glue Tips from Doll Artists


Today's post over at Art Dolls Only has a bunch of glue tips of interest to crafters and doll artists.   Tips such as "PVA glue is perfect to help air dry clay to stick to the armature better"  will be found here:  Tips and Tricks Friday: A Tacky Subject      A number of doll artists answer the question: "What is your favorite glue, and how do you use it?"  


If you don't find an answer to your question there, try the glue finder tool at Michaels "Glue It to It"

Friday, November 26, 2010

Video: How to Make Clay Leaves and a 5-Petal Flower

This first video below is from Ibenia at ColdPorcelainDesigns.com .  She shows us how to make an easy leaf with cold porcelain (or any other air-dry-clay).    The second video shows how to make a simple 5-petal flower.   This is a perfect project for beginners.  Use this idea for magnets, gift boxes & cake decorations, filler flowers, photo frame decorations, jewelry....etc,etc!


See more cold porcelain tutorials at Cold Porcelain Tutorials

Friday, November 19, 2010

Meet a New Clay: Cloud Clay

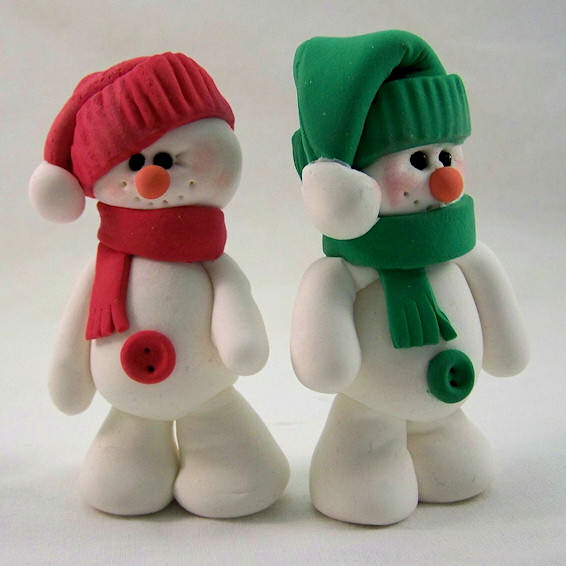
Cloud Clay snowmen, approx. 3" tall

I recently tried another new air-drying clay called "Cloud Clay".    When I first started working with it I ran into a number of problems but after a week or two of practice, I grew to like the clay.  The snowmen shown above were created after stumbling through a few hit & miss projects!

Cloud Clay is soft and easy to form.  I like it because it is easy on my hands (I have Arthritis) and I also like the vibrant colors. Cloud Clay is marketed to children but all ages should enjoy.  Adults who like crafting cute chracters or who have problems with their hands (like me) will like it's soft texture.  It is available in 4 oz packs in a smiliar price range as Model Magic and Makin's Clay.  (Large classroom packs are also available.)

Amaco introduced Cloud Clay in 2009.
This is manufacturer's description:

NEW! Super light modeling clay for ages 3+, available in 10 colors** in 4 oz packages.    Cloud Clay™ is as light as air … AP certified non-toxic and safe to use! This soft, puffy, and pliable modeling material is fun to squeeze, shape or mold. Cloud Clay has more ‘stretch’ than other brands, so fibers won’t break when pulled apart. Projects are more durable, even for the smallest of details.

This clay sticks to itself and not to hands. Colors blend well and mix with acrylics. Shrinks very little, so it can be used over an armature including balloons. This colorful clay dries overnight and decorates easily. Reusable when stored and sealed properly.


Crafters and kids can rubber stamp or press Cloud Clay™ into molds, model super heroes and fantasy creatures. Shape the sun, moon, and stars. The sky is the limit for creativity with Cloud Clay™.


Bear made with Cloud Clay (approx. 2.5 inches tall, seated)

My experience....
Cloud Clay is a soft, puffy, lightweight clay similar to Model Magic and a few other brands of very soft air-dry clays.   It's pretty stretchy too.   We pulled a piece to see how far it would stretch before breaking and it stretched the width of the table.  This stretchiness can be annoying when trying to pull a small piece of clay from the package because it doesn't break off easily.   I found it worked better to use scissors to cut off  the amount I needed, which is not really a problem.

Wednesday, November 17, 2010

Cold Porcelain Tutorials


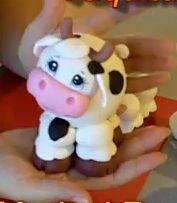
Today's post is a reminder that I have a separate blog for modeling with cold porcelain.  Cold Porcelain Tutorials is all about clay recipes, video demos and step-by-step tutorials specifically related to modeling cute figures with cold porcelain.  Flower-making is also popular with cold porcelain and you'll  find some links to websites with cold porcelain flowers for their topic!  So, if you're interested in this versatile, homemade clay, please visit Cold Porcelain Tutorials.   The featured demo for today is the cow shown above.   

Saturday, November 13, 2010

Make a Chef-themed kitchen noteboard


Every kitchen should have a chalkboard kitchen sign to display the evening’s menu, a grocery list, or a To-Do list for the chef.   This one is made with Creative Paperclay, some white fabric and a purchased chalkboard.   This would make a great holiday gift also!    See how-to instructions for this project at Michaels.com

Friday, November 12, 2010

Video: How to Knead Clay

This may seem like a silly question to most experienced clay hobbiests....but there are people who wonder how to properly knead clay dough (especially those guys who never made any bread from scratch ..LOL..just teasing!).

Although most air-dry clays don't require kneading to condition clay before using like polymer clay does, kneading is required to mix-in colorants or to smooth and condition clay (maybe because it's been stored for a while).  The action demonstrated in this video works for homemade clay, cold porcelain and any air-dry clay.

Monday, November 8, 2010

Easy Way to Make a Doll's Head Using Push Molds


Would you like to make clay dolls but find the task of sculpting the face a little daunting?   Especially the small features on a miniature doll!    A push mold might be your answer!    The face shown above was created with a 3" push mold.  Imagine making a Santa stump doll with this face, a beard and a festive robe!  For a miniature, the small 3/4" face molds should be a good size for a 1" scale doll.

In the following video, popular clay artist and instructor Maureen Carlson shows us how to make the best use of a push mold when creating a doll's head....plus how to customize the character's face!

She's demonstrating with polymer clay using her own molds (some of which have been discontinued since video was originally made).  Air-dry clay can also be used with push molds in the same manner as polymer.  There are a number of different push molds available for making dolls, flowers and other things (not just Maureen's).  You can also make your own push molds.   I'll guess we'll have to cover that topic another day!   ;-)


If you're looking for something more challenging or more creative than the easy-to-use push molds shown in above video, Maureen also makes and sells "Puzzle-Face" molds for creating faces similar to those shown below.


Puzzle-Face molds are also push molds but the facial parts are molded individually and then assembled onto a "blank" head.  Facial parts are also interchangeable.   The nose from one mold can be used with the mouth from another, etc.  Seems like there would be endless possibilities for giving them your own unique look!  In the following video, Maureen shows you how to get started with a Puzzle-Face.


Wednesday, November 3, 2010

How to Paint Eyes on Clay Figure


In today's video, clay instructor Marisol Romero shows us how to paint eyes (using acrylics) on a cold porcelain figure.   The eyes for the Jester Clown (from previous post) are shown in the demonstration, but, of course, these could be eyes for any of our cute air-dry clay figures!  She makes it look very easy!  ;-)

Sunday, October 31, 2010

Make This Cute CP Clown


Please see my other blog, Cold Porcelain Tutorials, for a step-by-step, 4-part, video demo creating the cute cold porcelain Jester Clown figure shown above!

Thursday, October 28, 2010

Make This Sweet Charm Bracelet


A perfect charm bracelet for someone who loves ice cream and cupcakes!   See step-by-step Clay Charms tutorial by Jennifer Hayes for making each charm with Crayola Air Cry Clay (or Paperclay, or Hearty Clay...your choice of just about any air-dry clay would be suitable for this project).

Jennifer says:   "If your daughter is anything like mine, she loves cupcakes, ice cream cones, and bracelets. When I began making clay charms, it made sense to me to combine all three. With inexpensive materials and a few free hours, I made a cute charm bracelet that my daughter loves."

Wednesday, October 27, 2010

Moose Head Pencil Topper

Decorate a pencil with a moose head...video demo....cute!


Monday, October 25, 2010

Make a Paperclay Pumpkin Pail


This clever Halloween tutorial from Carmen Ellis (Spooky Hollow Folk Art Designs) is full of humor and tips for using Creative Paperclay.    Create the miniature pumpkin pail shown in photo above starting with a hollowed-out Styrofoam ball and Paperclay  (makes about a 4 inch pail).   Go to this page for Carmen's "Poor Man's Pumpkin Pail".

Here's a sampling showing her sense of humor....some things you may relate to!
  • If you are half blind like me you might want to put your glasses on. ( My glasses are pitiful due to the dog eating them one night. ) 
You'll need:
  • Paper towel, ( I get super messy. Probably because of my half eaten glasses. )
  • Exacto tool or a sharp kitchen knife…( Don’t run with pointy objects )
  • Or whatever you can find around the house to sculpt with. (Please don’t use your cat.)
She also suggests placing the sculpt in a 200 degree oven to speed up drying.   I'd hesitate to recommend that.   Styrofoam could give off some toxic fumes when heated.    Even if the foam ball is wrapped in clay, it still doesn't seem like a great idea to me.

What does sound like a great idea is to make some miniature pumpkins from Paperclay using the designs shared last week in Pumpkin Carving Lesson and Pumpkin Carving Part 2 along with the ideas shared in the tutorial above!

Wednesday, October 20, 2010

Make a Miniature Seagull


Have you been thinking of making a beach-cottage dollhouse  or a beach-theme diorama?   This miniature seagull (1:12 scale) would be so perfect for that!   This detailed step-by-step Seagull Tutorial from Lesley Shepherd at About.com suggests using air-dry Delight clay to make the bird because Delight is very lightweight when cured.  Birds made with air dry clay can nest in branches or hang on tiny trees without pulling the tree branch down. 


Of course, if you prefer, other brands of air-dry clay could be used....or even polymer clay!  If miniatures are not your thing. I believe this seagull could be created larger using this same tutorial and still look very real!


Excuse me now, I must go and plan my miniature rustic beach cottage (with some seagulls)!   I think I will make it as 3-D wall art instead of a complete house!   Still planning........!    ;-)

Tuesday, October 19, 2010

Pumpkin Carving Part 2


After yesterday's post I stumbled on another great pumpkin carver at Extreme Pumpkins.   There you'll find a gallery of carving ideas, how to tips, free patterns and lots of photos of pumpkin carving contest winners!   The "Cannibal Pumpkin" pattern is probably my favorite...I think...hard to choose!  The one shown above is an interpretation of the one shown on cover of the Extreme Pumpkins book (written by owner of website).


The "Puking Pumpkin" shown below is probably the most famous!   Yuk!!!


Oh my!!!  He found a use for those extra small pumpkins!   Quite creepy!


Tom has lots of creepy ideas!  *G*


Tom Nardone, the owner of ExtremePumpkins.com has written a number of top-selling books on pumpkin carving that are chock full of tips and patterns.  


I found Tom's article on preserving your carved pumpkin very interesting.  Tom did went through a lot of effort to test different commonly-used products on some carved pumpkins to see which kept the pumpkin preserved the longest!   A very thorough study IMHO!    


You'll just have to check out his website after watching this video showing some of his cool stuff!


At Extreme Pumpkins you'll also find a totally FREE PDF file to download with patterns for these 48 pumpkin faces, a how-to guide and other ideas.   This is  a Halloween-themed website to bookmark and return to over and over!


Monday, October 18, 2010

Pumpkin carving lesson


Halloween approaches and many would-be sculptors contemplate carving a pumpkin!   We can only hope to be as good as Ray Villafane (shown above and below), but he shows us how with a step-by-step pumpkin carving tutorial.     btw....I just discovered that there's a distinction between carving & sculpting.  Pumpkin carving involves carving a pattern into the pumpkin surface while a pumpkin sculpt uses the pumpkin itself as a 3D sculpted object.


Maybe you want to do something a little simplier (OK...a LOT simplier)....all that carving just looks too hard!   How about a stencil or pattern to follow.   Find some free patterns at Fantasy Pumpkins  and Spook Master and stencils for sale at  Pumpkin Stencils 101 .

You'll also find more carving tutorials and pattern links at Fantasy Pumpkins.    Look at this great fairy pattern shown on his homepage!

Sunday, October 17, 2010

Ghost Necklace Tutorial


The other day we posted about a bat necklace.....here's another Halloween necklace.  Follow these step by step instructions for this cute Ghost Necklace from Makin's Clay.  They've used some glow-in-the-dark clay for this necklace, but I think those ghosts are cute enough to show off in the daylight!  ;-)    Nearly any air-dry clay would be suitable for this project!   

How about some matching dangling ghosts or pumpkins for earrings?  hmmm?

Wednesday, October 13, 2010

Meet a New Clay: LaDoll Cloth Clay


Cloth Clay  appears to be a new formula for LaDoll clay (which is distributed in USA by Activa).  Cloth Clay sounds similar to fabric stiffener or Paverpol because it can be used to drape fabric...but it's not exactly the same.  It is a liquid clay (packaged in a 600 gram jar).

Cloth Clay is an air-dry clay sure to inspire some new styles of doll crafting.  It can be used in a manner similar to the clay-over-cloth technique currently used by many soft doll crafters or used to drape fabric on a sculpted clay figure (see below)...or it can be used like a clay slip, to fill small holes or cracks on finished surface of a sculpted figure.  

For a smooth surface:
After modeling with LaDoll, Formofit, Premier or Premix, the artist will rub the surface to create a smooth finish. However, often there are tiny holes or cracks left on the surface  Apply
Cloth Clay with a flat brush  and allow to dry.  When dry, sand with a sanding pad (first Fine and then Extra Fine) in order to obtain a perfectly smooth, satin-like surface.

Instructions for use with cloth:

  1. Create a doll's body, head and limbs (with a wire armature, if desired). Model figure using LaDoll or your favorite clay.
  2. Cut out lace or fabric the desired pattern for the dress. Sew the parts together as necessary.
  3. Pour the required amount of Cloth Clay in a bowl. The amount depends on the amount of cloth.
  4. Soak the fabric thoroughly with Cloth Clay. After the fabric is thoroughly saturated with the clay, lightly squeeze (do NOT twist) the excess clay back into the bowl. Twisting the fabric will result in an uneven finish. You want enough Cloth Clay in the fabric but you don't need it "dripping wet".
  5. Return the remaining Cloth Clay to the original container and tightly seal. You may wish to place a piece of plastic wrap over the top of the container before tightening the top. You want to keep as much air out of the clay as possible.
  6. Spread out the squeezed cloth, separating the folds, etc., and place it on the doll's body. Remove any threads you might have used for gathering if necessary and cut all thread tails. Let air dry completely once you have the fabric placed as you would like.
  7. If desired, paint your creation with any water-based medium that you wish.
  8. Apply a finish coat with a clear water-based lacquer or sealant.
Let us know if you've tried this product and how you made use of it!

Tuesday, October 12, 2010

Bat Necklace Tutorial


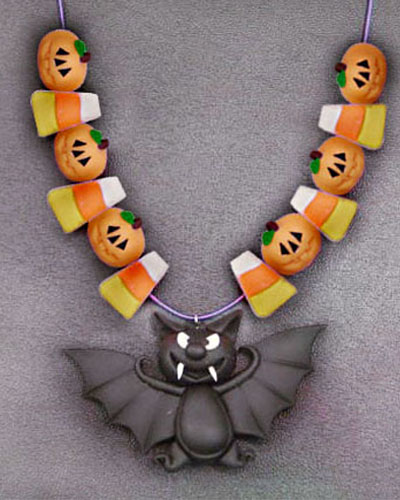
Make yourself some Halloween jewelry with this black & orange bat necklace tutorial from Makin's Clay!

Saturday, October 9, 2010

Mixing colors into air-dry clay

The majority of air-dry clays are available in white only and must be pre-tinted before modeling or painted when cured.  Sometimes a combination of both!  We've talked about many different things you can use to pre-tint your air-dry clay:  Acrylic paints, pastel chalks,  cake colorant and colors especially made for using with cold porcelain.   Guess what?   You can also use colored markers, as shown in this video from SmallEffort.

Friday, October 8, 2010

What is a BJD?


BJD stands for Ball-Jointed Doll.   It's a doll with ball-and-socket joints in its body, arms and legs.  Sometimes the waist and fingers also have articulating joints.    Making and customizing BJDs has been a popular hobby in Japan for a long time but popularity has now spread all over the globe.  Commercially made dolls are made of resin (and are quite expensive) but it's possible to make your own BJD with air-dry clay.  This is not a project for the beginner or the faint-of heart!   LOL

LaDoll and Creative Paperclay are two popular clays for creating BJDs.    Polymer clay is sometimes used but doll quality air-dry clays seem to be the most popular for one of a kind BJDs.


There are many variations in the way to join each part of a doll, but essentially all limbs and joints are joined together by hooks and loops of elastic that are string as shown in image below.
A well-balanced, well-constructed doll can sit, bend and stand by itself and imitate human movement very accurately.  Arms are attached by elastic running through the armholes and torso.  In each leg, loops of elastic run from a hook inside the ankle up through the knee, through the leg-hole, and up to the head.  All loops being hung on a hook inside the neck.   Another band is attached to hooks strung inside the wrist joint.

Of course, to have this type of joint stringing, the doll must be hollow.   There are several different methods for accomplishing this.   The one thing they all have in common is that dolls are made in sections which are formed over some kind of removable armature.    Many tutorials suggest using Styrofoam, straws and other material as the removable armature when creating hollow parts.


Tutorial Links:

"How to Make Noah's BJD Doll"    A lengthy and detailed, step by step set of instructions previously featured here at NewClayNews.

"How to Sculpt a BJD Doll using Paperclay"    Another excellent and detailed tutorial we've previously featured.

How to Create the Aimi BJD (Google translation)  The traditional Japanese method with very detailed instructions to create the doll shown at top of this post. Original Japanese page

"What is a BJD" is a lengthy, multi-chapter article explaining BJDs, their manufacture, wigging, costoming, stringing, repairing,etc

"How Ball Joints Work"   A series of photos showing the inner workings of all the joints.

Wednesday, October 6, 2010

Clay flowers as gift decoration


Have you ever thought of decorating a gift box with some clay flowers?   Two gifts in one!    Here's some ideas from Craft Ideas for All.

LinkWithin

Related Posts Plugin for WordPress, Blogger...